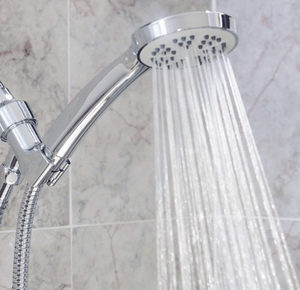
So you want to learn how to replace a shower head?
Replacing a shower head is a straightforward task that can be done by anyone, regardless of their plumbing experience.
Whether you’re looking to upgrade your existing shower head or replace a broken one, this guide will provide you with step-by-step instructions to get the job done quickly and easily.
Know What You Need

Before you get started, it’s important to choose the right shower head for your needs.
There are several types of shower heads available on the market, each with its own features and benefits. Some popular options include rain shower heads, handheld shower heads, dual shower heads, and massage shower heads.
Consider factors such as
- water pressure,
- spray pattern, and
- ease of use
when replacing your old shower head.
It’s also essential to gather the necessary tools and materials before you can begin. You’ll need
- a new shower head,
- Teflon tape,
- a wrench, and
- a clean rag.
Once you have everything, you can begin the process of replacing your shower head.
Step 1: Turn off the Water Supply
The first step in any plumbing project is to turn off the water supply. Locate the shut-off valve for your shower and turn it off. If you can’t find the valve or it’s difficult to access, turn off the main water supply for your house.
Step 2: Remove the Old Shower Head
Next, remove the old shower head by turning it counterclockwise. If it’s difficult to remove, use a pair of pliers or a wrench to loosen it.
Be careful not to damage the shower arm, which is the pipe that extends from the wall and connects to the shower head.
Step 3: Clean the Shower Arm
Before installing the new shower head, clean the shower arm to remove any debris or buildup. You can use a cloth or a small brush to clean the threads of the shower arm.
Step 4: Apply Teflon Tape
To ensure a tight seal, wrap Teflon tape around the threads of the shower arm in a clockwise direction. Be sure to cover all the threads, but avoid overlapping the tape.
Step 5: Install the New Shower Head
Next, screw the new shower head onto the shower arm in a clockwise direction. Use your hands to tighten it as much as possible, and then use pliers or a wrench to give it an extra quarter-turn.
Step 6: Turn on the Water Supply
Next, turn the water supply back on and check for leaks. If you notice any leaks, turn off the water supply again, and tighten the connections.
Step 7: Test the new Shower Head
Finally, test the new shower head to make sure it’s working correctly. Check for any leaks or drips. Adjust the water flow and spray pattern to your liking.

Once you’ve confirmed that there are no leaks, you can enjoy your new shower head.
Replacing a shower head is a quick and easy project that can make a big difference in your daily routine.
Whether you choose a rain shower head for a luxurious spa-like experience or a massage shower head for sore muscles, the right shower head can transform your shower into a relaxing oasis.
With these simple steps, you can install a new shower head in no time and enjoy all the benefits of a modern, efficient shower head.
