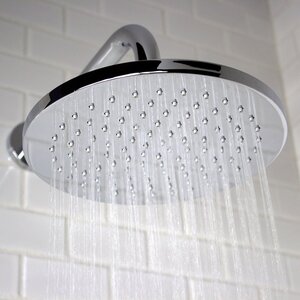
Installing a wall-mounted rainshower head can transform your bathroom and enhance your showering experience.
Wall-mounted rainshower heads are popular for their luxurious and soothing water flow. A rainfall shower head can create a refreshing and relaxing spa-like atmosphere in your bathroom.
Here’s a step-by-step process of how to install a wall-mounted rainshower head, and provide you with helpful tips to ensure your installation goes smoothly.
What You’ll Need To Install a Wall-Mounted Rainshower Head
Before you begin, here are the materials you’ll need:
- Wall-mounted rainshower head
- Shower arm
- Thread seal tape
- Adjustable wrench
- Teflon tape
- Silicone caulk
Step 1: Turn off the Water Supply
Before you start any plumbing work, always turn off the water supply to the rainshower head. You can do this by shutting off the water valves located in the bathroom or the main water supply valve to the house.
Step 2: Remove the Old Showerhead
Remove the old showerhead and shower arm from the wall using an adjustable wrench. You may need to use a bit of force to loosen any rusted or stuck connections.
Once the old showerhead is removed, clean the shower arm threads and apply Teflon tape to the threads. This will help create a watertight seal when you install the new showerhead.
Step 3: Install the Shower Arm
Attach the new shower arm to the wall by screwing it into the threaded hole in the wall. Use an adjustable wrench to tighten the shower arm securely. Be careful not to over-tighten, as this can damage the shower arm or cause leaks.
Step 4: Install the Rainshower Head
Attach the new rainshower head to the shower arm by screwing it into place. Use an adjustable wrench to tighten the connection securely.
Again, be careful not to over-tighten. Otherwise you risk damaging the shower head.
Step 5: Test the Water Flow
Once the rainshower head is securely attached, turn on the water supply to the shower and check for leaks.
Allow the water to run for a few minutes to ensure that the water flow is steady and consistent. If you notice any leaks or irregularities in the water flow, turn off the water supply and adjust the connections accordingly.
Since the entire rainfall shower head experience depends upon an uninterrupted supply of water at adequate pressure, this is an important step of how to install a wall-mounted rainshower head.
Step 6: Apply Silicone Caulk
Once you’re satisfied with the water flow and connections, apply a small amount of silicone caulk around the base of the shower arm and rainshower head to create a watertight seal. Smooth out the caulk with a caulk smoothing tool or your finger.
Step 7: Clean Up
Clean up any debris or excess caulk from the installation area and let the silicone caulk dry completely before using the shower.
How to Install a Wall-Mounted Rainshower Head : Tips for Success
- Measure the distance from the wall to the showerhead to ensure that the new rainshower head will fit comfortably in the space.
- Use thread seal tape to create a watertight seal around the shower arm threads.
- Consider using a plumber’s strap wrench to loosen any tight connections or rusty showerheads.
- When attaching the showerhead and shower arm, be sure to use the proper fittings and connections recommended by the manufacturer.
- Always turn off the water supply before starting any plumbing work.
- Make sure the connections are tight but be careful not to over-tighten, as this can cause leaks or damage the showerhead or shower arm.
- Allow the silicone caulk to dry completely before using the shower.
- Consider hiring a professional plumber to install the rainshower head if you’re not comfortable with DIY plumbing work.
Enjoy Your New Rainshower Head
Knowing how to install a wall-mounted rainshower head is a great way to upgrade your bathroom and add a touch of luxury to your showering experience. With the right tools and a bit of DIY know-how, you can easily handle the task.
Follow the steps outlined in this article and the tips provided to ensure a successful installation. With a little effort and attention to detail, you can enjoy the soothing and luxurious water flow of a rainshower head in your own home.
A Word of Caution
It’s important to note that the installation process may vary slightly depending on the type and brand of rainshower head you choose.
Be sure to read the manufacturer’s instructions carefully before beginning the installation process.
If you encounter any problems during the installation or are not comfortable with DIY plumbing work, it’s always a good idea to hire a professional plumber.
They have the expertise and tools needed to ensure a safe and successful installation, and can also provide helpful advice on choosing the right rainshower head for your bathroom.

