
Do you know how to replace a shower head gasket? Well, that matters. Because, if you experience water leakage or low water pressure from your shower head, there’s a good chance that the gasket is worn out or damaged.
A shower head gasket is a small but vital component that sits between the shower head and the pipe. Over time, it can become corroded, cracked, or loose, leading to water leakage or reduced water flow.
Thankfully, replacing a shower head gasket is a simple and inexpensive DIY project that you can do yourself. This guide will take you through the process of replacing a shower head gasket, step by step.

Step 1: Turn Off the Water Supply
Before you start working on your shower head, you need to turn off the water supply. Locate the shut-off valve for your shower and turn it off. If you can’t find the valve or it’s not working, you can turn off the main water supply for your house.
Step 2: Remove the Shower Head
Use a wrench or pliers to loosen the shower head from the pipe. Turn it counterclockwise until it comes off. Be careful not to scratch the finish of your shower head or the pipe.
Step 3: Remove the Old Gasket
Once you’ve removed the shower head, you should be able to see the old gasket. If it’s still intact, you can carefully pry it off with a screwdriver. If it’s damaged, it might crumble or break apart, making it easier to remove.
Step 4: Clean the Shower Head and Pipe
Use a soft cloth or brush to clean the threads of the shower head and the pipe. Remove any dirt, debris, or old gasket residue. This will help ensure a tight seal when you install the new gasket.

Step 5: Install the New Gasket
Place the new gasket over the end of the pipe. Make sure it’s centered and snug. If it’s too loose, water will leak out. If it’s too tight, you won’t be able to screw the shower head back on.
You can use a small amount of plumber’s tape or silicone lubricant to help hold the gasket in place.
Step 6: Reattach the Shower Head
Carefully screw the shower head back onto the pipe. Turn it clockwise until it’s hand-tight. Then use a wrench or pliers to tighten it another 1/4 to 1/2 turn. Be careful not to overtighten, as this can damage the gasket or the threads.
Step 7: Turn on the Water Supply
Once you’ve reattached the shower head, you can turn on the water supply. Check for leaks around the shower head and the gasket. If there’s still water leaking, you may need to tighten the shower head a bit more or replace the gasket again.
That’s it!
You’ve successfully replaced your shower head gasket.
This simple and quick DIY project can help restore your shower to its former glory and save you money on your water bill.
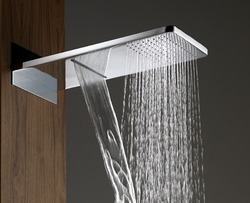
In addition to replacing the gasket, you might also consider upgrading your shower head to a more modern and efficient model. There are many different types of shower heads available on the market, from rainfall shower heads to handheld shower heads to high-pressure shower heads.
By choosing a more efficient model, you can save water and reduce your energy bills.
When replacing a shower head gasket, it’s also a good idea to inspect the shower head and pipe for any signs of damage or wear. If you notice any cracks, rust, or mineral buildup, you might need to replace the entire shower head or pipe.
To prevent future problems with your shower gasket, you should also be mindful of how you use your shower.
Avoid using abrasive cleaners or scrubbers that can damage the finish of the shower head or pipe. You should also try to avoid over-tightening the shower head, as this can cause the gasket to become damaged over time.
If you’re not comfortable with doing the replacement yourself or encounter any difficulties, you may want to consider hiring a professional plumber to do the job for you.
A licensed plumber will have the expertise and tools needed to quickly and efficiently replace your shower head gasket, as well as identify any other potential problems with your shower system.
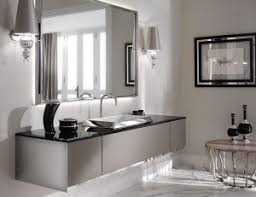
In addition to replacing the gasket, you can also give your bathroom a makeover by upgrading other fixtures, such as the sink faucet, toilet, and bathtub. By updating these fixtures, you can not only improve the functionality and efficiency of your bathroom but also increase its aesthetic appeal and overall value.
Replacing a shower gasket is a simple and affordable DIY project that can save you time and money in the long run.
You can restore your shower’s water pressure and prevent water leakage. And if you need any further assistance or advice, reach out to a professional plumber or home improvement expert.