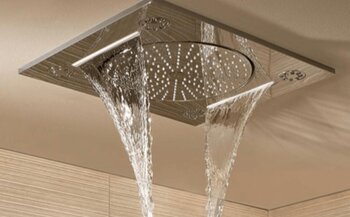
So you want to know how to install a ceiling-mounted rainshower head?
A rainshower head can turn your daily shower into a soothing and luxurious experience. If you’re looking to upgrade your bathroom, a ceiling-mounted rainshower head is an elegant, sophisticated choice.
In this guide, you’ll learn about the steps on how to install a ceiling-mounted rainshower head.
Before You Begin
Before you start your installation, there are a few things you need to consider.
First, you need to ensure that your ceiling is strong enough to support the weight of your rainshower head.
Secondly, you need to determine the right placement for your rainshower head to ensure optimal water coverage.
If you’re not experienced and comfortable doing the installation yourself, it’s always best to consult with a professional plumber or contractor to ensure that your installation is done safely and correctly.
Tools and Materials Needed to Install a Ceiling-Mounted Rainshower Head
- Ceiling-mounted rainshower head kit
- Adjustable wrench
- Screwdriver
- Drill
- Measuring tape
- Plumber’s tape
- Silicone sealant
Step 1: Prepare Your Shower Area
The first step in installing your ceiling-mounted rainshower head is to prepare your shower area.
Start by turning off the water supply to your shower. Next, remove your old showerhead and arm using an adjustable wrench.
Once you’ve removed your old showerhead and arm, clean the shower arm threads using a rag to remove any debris or dirt. Make sure the threads are clean and free of any buildup that may cause leaks.
Step 2: Install the Shower Arm Flange
Your ceiling-mounted rainshower head kit should come with a shower arm flange that covers the hole in your ceiling where the shower arm will come through. Install the flange onto the ceiling using screws and a drill.
Step 3: Install the Shower Arm
Next, install the shower arm into the flange by screwing it in tightly. Make sure to use plumber’s tape on the threads to prevent leaks.
Step 4: Install the Rainshower Head
Attach your ceiling-mounted rainshower head to the end of the shower arm using a screwdriver. Tighten the head securely and use plumber’s tape on the threads to prevent leaks.
Step 5: Test Your Rainshower Head
Once you’ve installed your ceiling-mounted rainshower head, it’s important to test it to ensure that it’s working properly.
Turn on the water supply to your shower and check for any leaks around the shower arm and head.
If you notice any leaks, turn off the water supply and tighten the connections using an adjustable wrench.
If the leaks persist, consult with a professional plumber or contractor.
Step 6: Apply Silicone Sealant
Finally, apply silicone sealant around the base of the flange and shower arm to prevent any water from seeping through the hole in your ceiling.
This will also help to keep the shower arm and rainshower head in place.
Conclusion
Knowing how to install a ceiling-mounted rainshower head can add a touch of luxury and sophistication to your bathroom.
With the right tools and materials, it’s a job that can be done easily and quickly. Follow these steps to ensure a safe and proper installation, and enjoy your new rainshower head!
