Are you ready to upgrade your bathroom with a brand new shower head? Great news, because installing a shower head is super easy and can be done in just a few simple steps.
In this article, I’ll guide you on how to install a shower head. We’ll go through the process of installing a shower head step by step, so you can enjoy a refreshing shower experience in no time.
How To Install a Shower Head

Before we get started, make sure you have all the necessary tools and equipment.
You’ll need
- a wrench,
- plumber’s tape, and of course,
- your brand new shower head.
If you’re not sure what type of shower head to choose, check out some reviews online or visit your local home improvement store for some advice.
Step 1: Remove the old shower head
The first step is to remove your old shower head. Use a wrench to loosen the shower head and remove it from the shower arm. Be careful not to damage the shower arm, which is the pipe that connects the shower head to the wall.
Step 2: Clean the shower arm
Now that the old shower head is removed, it’s a good idea to clean the shower arm to ensure there’s no debris or leftover plumber’s tape. Use a clean cloth to wipe down the shower arm and remove any excess tape.
Step 3: Apply plumber’s tape
Before installing the new shower head, apply plumber’s tape to the threads on the shower arm. This will help create a watertight seal and prevent leaks. Wrap the tape around the threads in a clockwise direction, making sure to cover all the threads.
Step 4: Attach the new shower head
Now it’s time to attach your brand new shower head! Place the shower head onto the shower arm and tighten it with your hands. Use the wrench to tighten it a little more, but be careful not to over-tighten, which could damage the shower head.
Step 5: Test the new shower head
Congratulations, you’ve successfully installed your new shower head!
But before you start using it, it’s important to test it for any leaks. Turn on the water and check for any drips or leaks around the shower head.
If you notice any leaks, turn off the water and tighten the shower head a little more.
But wait, there’s more!
If you want to take your shower experience to the next level, consider some additional upgrades.
One popular option is a handheld shower head, which can be easily detached from the wall and used for more targeted washing. These are particularly useful for those with mobility issues, as they allow for greater flexibility and ease of use.
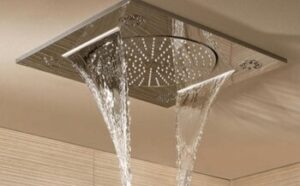
Another upgrade to consider is a rainfall shower head, which simulates the feeling of standing in the rain. These shower heads are typically larger and positioned overhead, providing a gentle, soothing flow of water.
And finally, don’t forget about water-saving shower heads. These shower heads use less water than traditional models, making them more environmentally friendly and potentially saving you money on your water bill.
No matter what type of shower head you choose, make sure to do your research and read reviews to find the best one for your needs.
And always follow the manufacturer’s instructions for installation and maintenance.
So go ahead, take the plunge and upgrade your shower head. Your body (and your bathroom) will thank you!
And that’s it, folks!
Installing a new shower head is a quick and easy way to upgrade your bathroom and enjoy a more luxurious shower experience.
Just follow these simple steps, and you’ll be on your way to a refreshing and rejuvenating shower in no time. Happy showering!
